Google Tag Manager (GTM) is a powerful tool for managing and deploying marketing tags on your website without modifying the code directly. If you’re collaborating with a team or working with an agency, you might need to invite users to your GTM account. Here’s a simple guide on how to grant Google Tag Manager access.
Step-by-Step Guide to How to Grant Google Tag Manager Access
Step 1: Sign In to Your GTM Account
First, log in to your Google Tag Manager account. Ensure you have administrative access, as only admins can invite new users.
For reference, here is the link for Google Tag Manager.
Step 2: Navigate to Account Settings
Once logged in, select the account to which you want to add a user. Click on the account name, and then navigate to the “Admin” section located in the left-hand sidebar.

Step 3: Access User Management
Under the “Admin” section, you’ll see two columns: Account and Container. In the “Account” column, click on “User Management.”

Step 4: Add a New User
In the “User Management” section, you’ll see a list of current users. Click on the blue “+” button in the top right corner and select “Add Users.”

Step 5: Enter User Details
A new window will appear where you can enter the email addresses of the users you wish to invite. Enter the email address and then choose the permissions for the new user. You can assign account-level permissions (Admin or User) and container-level permissions (No Access, Read, Edit, Approve, or Publish). You can add multiple users here, by adding more email addresses.
If you’re adding one of us at VonClaro, be sure to give all permissions, so that we can add our team of SEO specialists.
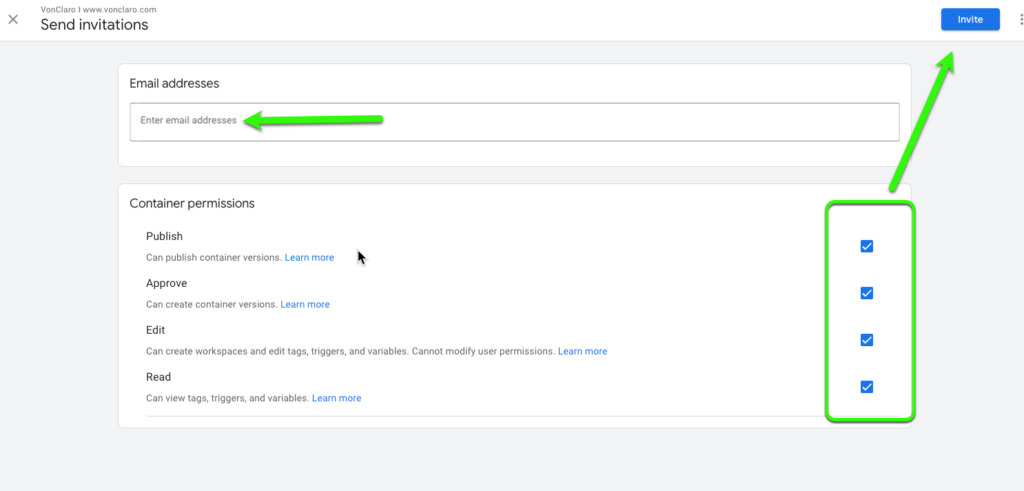
Step 6: Set Permissions
Select the appropriate permissions for the new user based on their role. For example, if the user needs to manage tags and publish changes, you might give them “Edit” and “Publish” permissions at the container level.
Step 7: Send the Invitation
After setting the permissions, click on “Invite.” The user will receive an email invitation to join your Google Tag Manager account. They need to accept the invitation to gain access.
Best Practices for User Permissions
- Admin Permissions: Grant these only to users who need full access to all settings and configurations.
- Publish Permissions: Assign these to users who are responsible for publishing tags and changes.
- Edit Permissions: Useful for users who need to create and modify tags but not publish them.
- Read Permissions: Ideal for users who only need to view configurations and settings without making changes.
Conclusion
Inviting a user to Google Tag Manager is a straightforward process that allows you to collaborate effectively with your team. By setting appropriate permissions, you can ensure that each user has the access they need to perform their tasks without compromising your account’s security.
Inviting users to your GTM account enables streamlined collaboration and efficient tag management, enhancing your website’s marketing and analytics capabilities. Follow these steps, and you’ll have your team set up in no time!
Be sure to checkout our article on Shopify and Google Tag Manager.